Manufacturers: FrontRank, Galloping Major, RedoubtEnterprises, NorthstarMiniatures, WargamesFoundry
Scale: 28mm
Hello again,
this post completes my last post as it is about the game we played on Sunday, 14th of April 2024. Within the last post I just introduced the terrain - so here is the report about the battle that took place within the mentioned terrain.
The battle had been fought between:
- Christopher, aka "Axebreaker" (maybe you already know his wargaming blog https://christopher-bunkerhill.blogspot.com/2024/02/early-saxongermanic-collection-rebased.html) - if you do not know his blog already - just take a look at it.
- Lucas Luber, (this is the guy behind the wonderful figures of PianoWargames https://pianowargames.de/de/ - I am sure that you have already heard about his figures as they are really great;
- my dear friend Franz and me.
Christopher is also the creator of this scenario. Here is the mission of the battle:
British are to get the supplies from the ship to the stockade.
Defender Deployment Points- Ship, Indian Longhouse(Indians only), Stockade, Porthouse Attacker Deployment Points- 6 Points at least 18" from any British Figures
British Reinforcements- They may place 30% in reserve from the fort or the ship to be deployed on the first red clock.
French Reinforcements- Any unused Deployment point becomes a reinforcement point and all others are removed after initial deployment.
Boats from the ship- Take one full move to reach shore. Disembarking troops may only deploy, but not move.
Wagon Train- Moves 7 inches on the road. It moves on a civilian card. A 4 inch gap must be placed between each wagon. A wagon becomes stuck in the mud on a 11 or 12 on a 2d6 and will require a second civilian move card to move again.
The attacker starts the game.
Objectives
0 Wagons arrive- British will starve over the winter. Major French Victory!
1 Wagon arrives- British will get by the winter, but on half rations leaving them very vulnerable to attack through loss of personal. Minor French Victory.
2 Wagons arrive- Enough supplies to keep the men fit and hold the fort, but can expect attacks. Minor British Victory.
3 wagons arrive- Abundance of supplies and will allow the British to continue further expansions. Major British Victory!
The game ends with the fifth red clock.
Intrigues are in play. The side which achieves the most intrigues wins this part anything else is a wash and will have no effect.
Christopher and Lucas had to lead the French units, while Franz and I got the British forces.
Here is a brief cronicle of the fight:
Franz and I planned to get an unit of rangers into the watchtower as soon as possible to get a better overview and to use their ability being sharpshooters and having long rifles. They could then have overlooked the woods and spotting and firing would be easier for them. They even managed to reach the tower but before they could get inside they had been attacked by a unit of French Courier deBois and even had been wiped out after the reaction test. As often we had been unlucky in rolling the dice.
Meanwhile the French allied Indians came through the woods and defeated the Iroqouis warriors. The reinforcements of the British grenadiers came up but they had not been able to get into contact with the enemy.
The French regulars even managed to destroy the British Provincials who had to cover the stockade.
With no more forces left inside the stockade and running out of time for the British the outcome of the game was clear for the French surely would hold the fort. So even if the waggon train would have reached the stockade it would have been caught by the French. So it was a major French victory and a desaster for the British forces. It reminded me of the battle on the Monongahela there the British had been slaughtered by the French.
A really good scenario and also a wonderful game of Muskets&Tomahawks again.
The only thing was that we had to look up a lot of things in the rule book again. We should play it more of and we also should optimize the QRS.
Cheers
Mike
 |
| Victory !!! |
 |
| A view of the terrain. |
 |
| The starting point of the waggon train. |
 |
| The Iroquois warriors placed next to their longhouse. |
 |
A unit of British Regulars and a unit of Roger´s Rangers starting from the stockade.
|
 |
| Two of at least six deployment zones of the French forces. |
 |
| Another deployment zone... |
 |
| ...and also another one. |
 |
| A French unit of Compagnies franchaise de la Marine departing at their deployment zone... |
 |
| ...that is just the nearest to the stockade. |
 |
| The Huron warbands deploying in the middle of the table. |
 |
| Christopher´s French militia - real eyecandy. |
 |
| A close-up of a deployment marker painted by Christopher, aka "Axebreaker" |
 |
| The first movement of the waggons. |
 |
| The British units leaving the stockade. |
 |
| The Iroqouis try to cover the waggon train. |
 |
| The Rangers first move towards the Watching tower while the British Regulars try to form up to cover the Rangers´ movements. |
 |
| The second activation of the train. It seems that the British may have a good chance. |
 |
| The French Regulars getting closer. |
 |
| And also the French Irregulars appear on the terrain.(top left) |
 |
| The first British reinforcements come in - a unit of Provincials |
 |
| The Provincials and the British Regulars manage to get into a firing line. |
 |
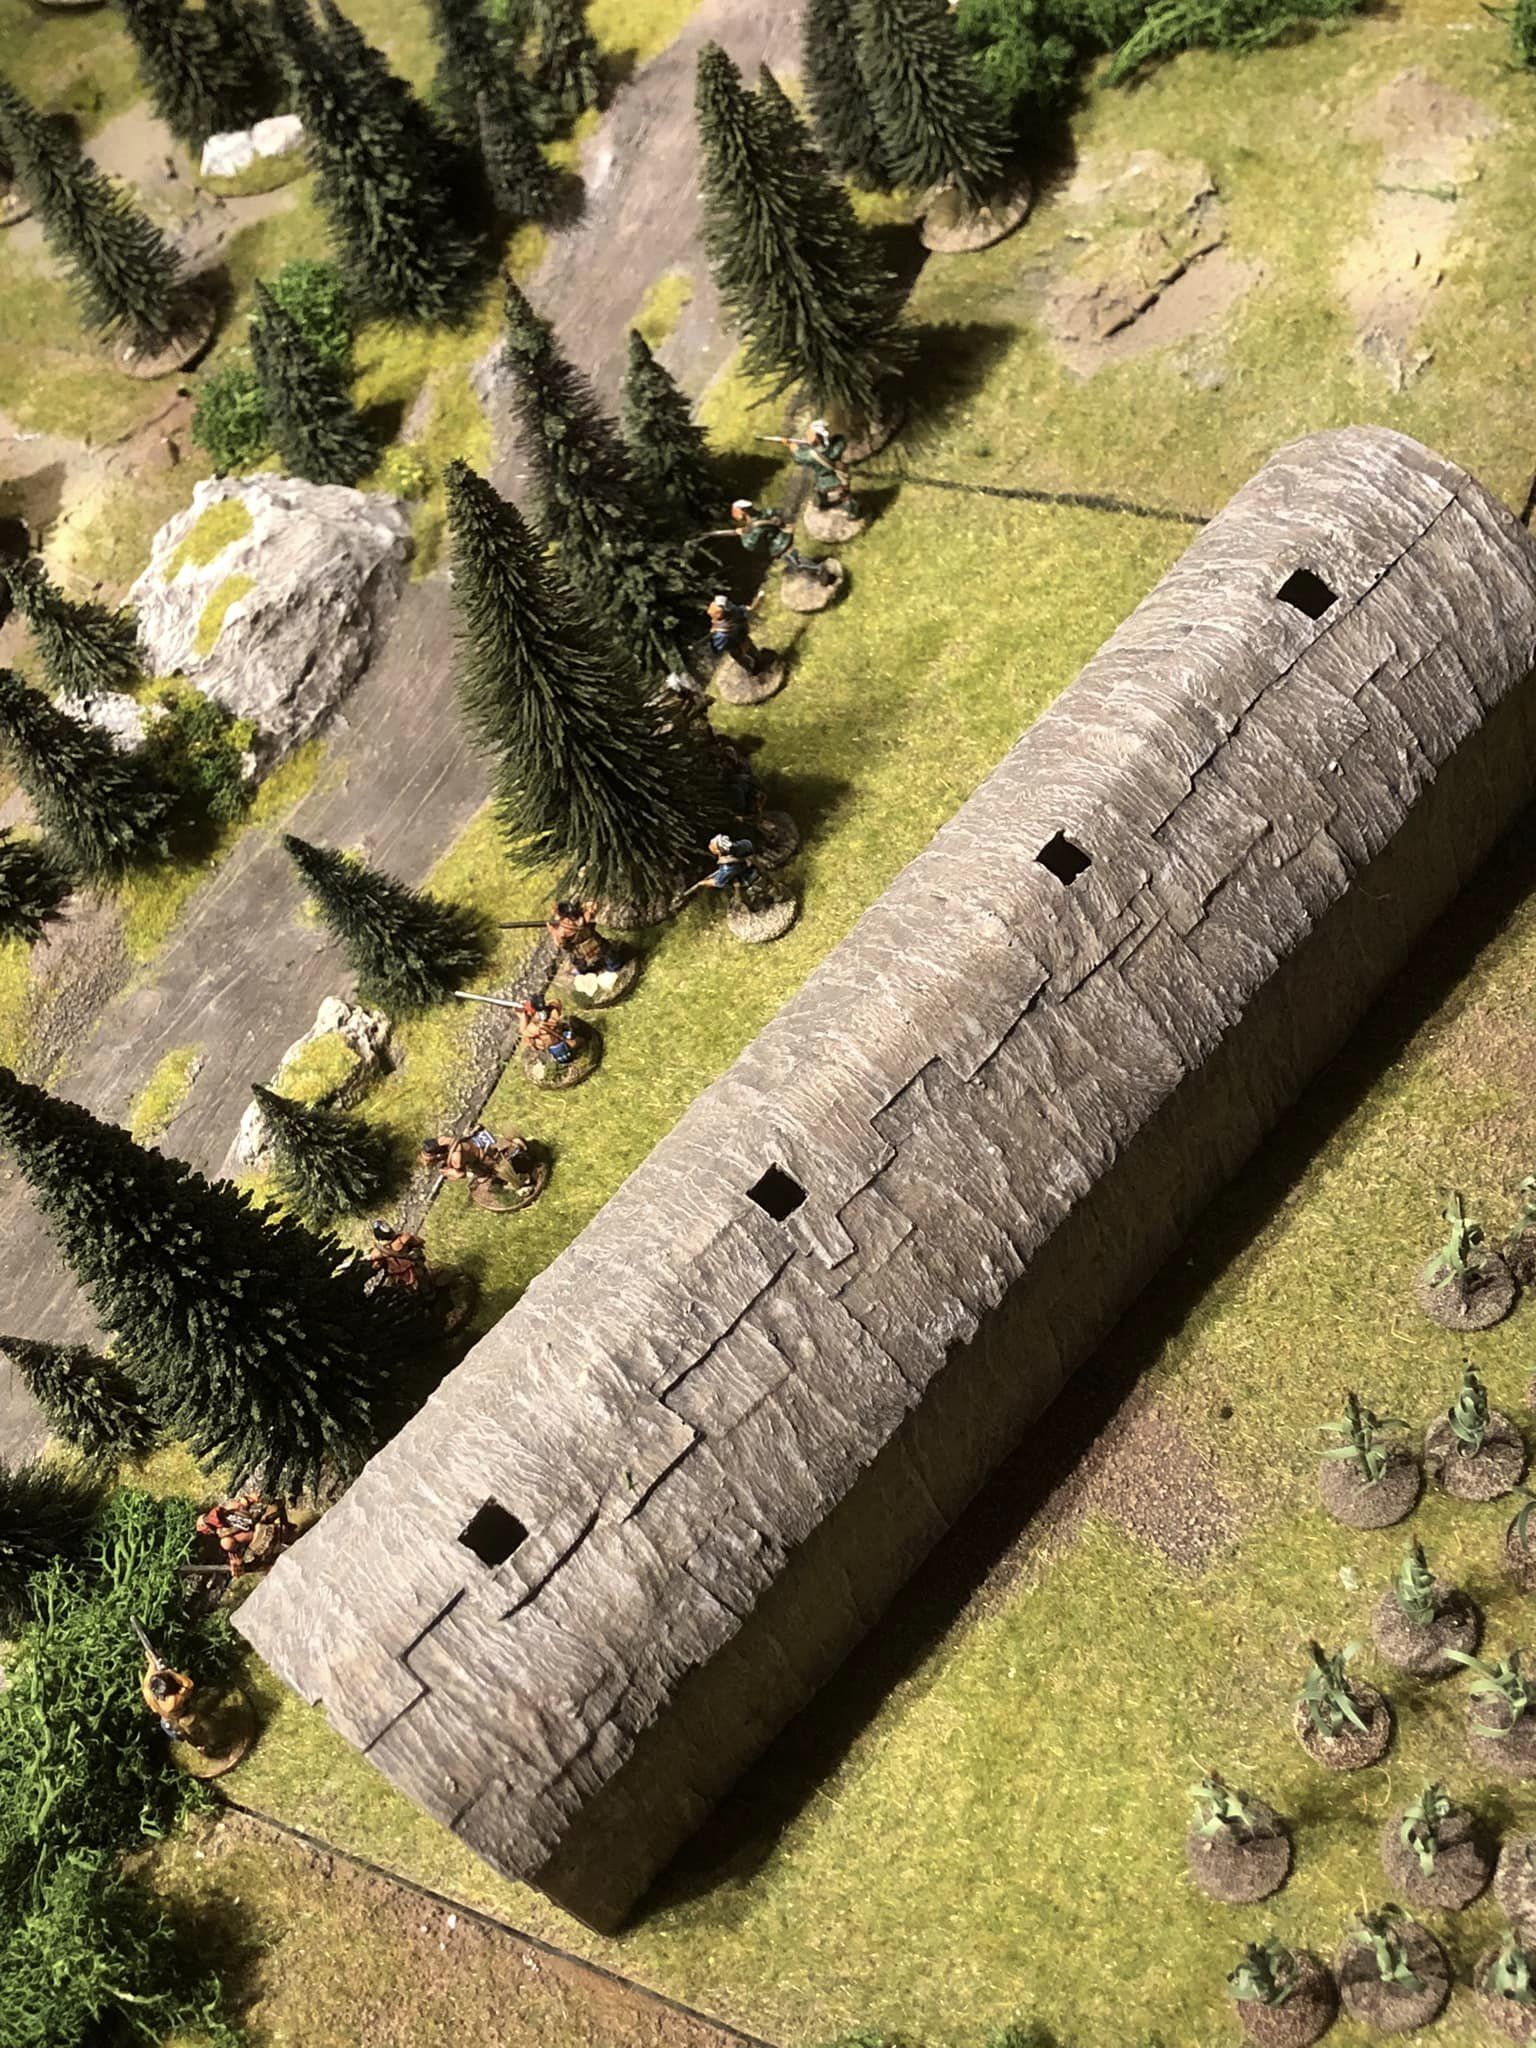
| Roger´s Rangers only need one more movement to get into the tower... |
 |
| ...but before they are able to enter the tower a unit of French Irregulars attacks them and close combat starts... |
 |
| ...with the Rangers being defeated and even failing their reaction test. The whole unit routs. |
 |
| One of the Iroquois warbands starts close combat with the French attackers and is able to kill the unit except one single figure which has to flight. But he still remains on the table. |
 |
| Three units of Hurons preparing to fight against one unit of Iroqouis warriors. |
 |
| Meanwhile the waggon train moves on. In front of the first waggon you can see the single left figure of the French Irregulars. Though the unit only exists of one man he could stop the first waggon by simply touching its base. |
 |
| The Hurons had been able to defeat the Iroqouis. |
 |
| The second British reinforcements arrive. A unit of Grenadiers has disembarced from the British ship. |
 |
| The British Provincials and the Regulars confronting the French Compagnies de La Marine. |
 |
| The British Grenadiers coming closer to the waggon train... |
 |
| ...which is already totally captured by the Hurons. |
 |
| While the British Regulars try to reach the waggon train the French Regulars managed to defeat the Provincials - The Provincials simply had to make a retreat movement that took them out of the game. |
 |
| So - the stockade is no longer under British control and the French raise their flag. |
 |
| No more chance to win the game for the British as they had lost more than half of their troops. The French casualties had been very low. |
 |
| Waving the flag to point out that this had been a major victory for the French forces. |
The following pictures are just a few close ups. |
| The British Grenadiers embarking. |
 |
| The Hurons (buttom) attacking the Iroqouis (top). |
 |
| The French Regulars´ first attack on the British Provincials. |
 |
| The British Regulars try to reach the waggon train in order to fight the Hurons. |