Manufacturer: Do-it-yourself
Scale: 28mm
Hi again,
last week there was the movie "Kingdom of Heaven" on television.
I like this movie very much, especially the storming of Jerusalem by Saladin and his army. There they use a lot of siege towers and I decided that I would also need at least one siege tower for my actual SAGA project. Just for fun and terrain.
After a quick search in the internet I found some pictures of really nice siege towers. I was so fascinated by my own idea that I started to build such a tower on sunday morning.
Using my great collection (;)) of wooden sticks, glues and other things it took me the whole day and the half of today to get it ready for painting.
For it is my first try I think that it is not too bad, though I noticed during building the tower that I could do some things easier. If I should ever build another one I will surely do so. :)
 |
| The finished siege tower - ready for painting. |
 |
| A view from the back of the tower. |
 |
| The chain is movable to get the ramp up and down. |
 |
| And here a picture of how the tower looks like in action. |
 |
| The wall segment was built with the fantastic moulds of "Hirst Arts". |
So that´s the tower - but how did I do it?
If you are interested in the way I built it up here is a tutorial - but it consists of many, many pictures. :)
 |
| Using different wooden sticks - 5mm and 2mm - And I needed a lot of them. |
 |
| Gluing the sticks together using clipper to fix them while drying. |
 |
| Meanwhile I cut two sticks (5mm) with 16cm in length and drilled some holes in. |
 |
| Within these holes I glued some wire pins. |
 |
| Then I prepared 3 sticks (5mm) of 8cm in length. |
 |
| The other prepared sticks got just three further holes filled with wire pins. |
 |
| Then I drilled holes on top of the 8cm sticks. |
 |
| Then I put the sticks together using the wire pins for better fixing of the glued connections. |
 |
| The next step was building the wooden wheels. Therefore I used some washers to get at least 6 wheels. |
 |
| First step was to glue some wooden coffee sticks on the washers. I got the coffee sticks from a bakery which just sold 1000 sticks to me. |
 |
| I just glued coffee sticks on both sides and after the glue had dried I gave it a round shape with scissors. |
 |
| After that I used sand paper to bring it into better shape. |
 |
| Getting some strips of paper by cutting an old cereal box. |
 |
| This was really fiddly. |
 |
| The finished wooden wheels. |
 |
| After producing the wheels I cut two pieces of 20cm length out of the combined sticks I fixed with clippers. |
 |
| These sticks got drilled again and prepared with wire sticks. And again three sticks of 8cm length being drilled on their top ends. |
 |
| The first part of the skeleton of the tower is built up. |
 |
| Getting the next part into an angle of 90 degrees. |
 |
| Again a hole drilled and a glued wire pin. |
 |
| Then two sticks of 8cm length are glued on the skeleton to be able to fix the next part. |
 |
| The skeleton is ready for getting the wooden planking. |
 |
So later on I had to cut it off. Just one of the many things I won´t do a second time if I should build up another tower.

 |
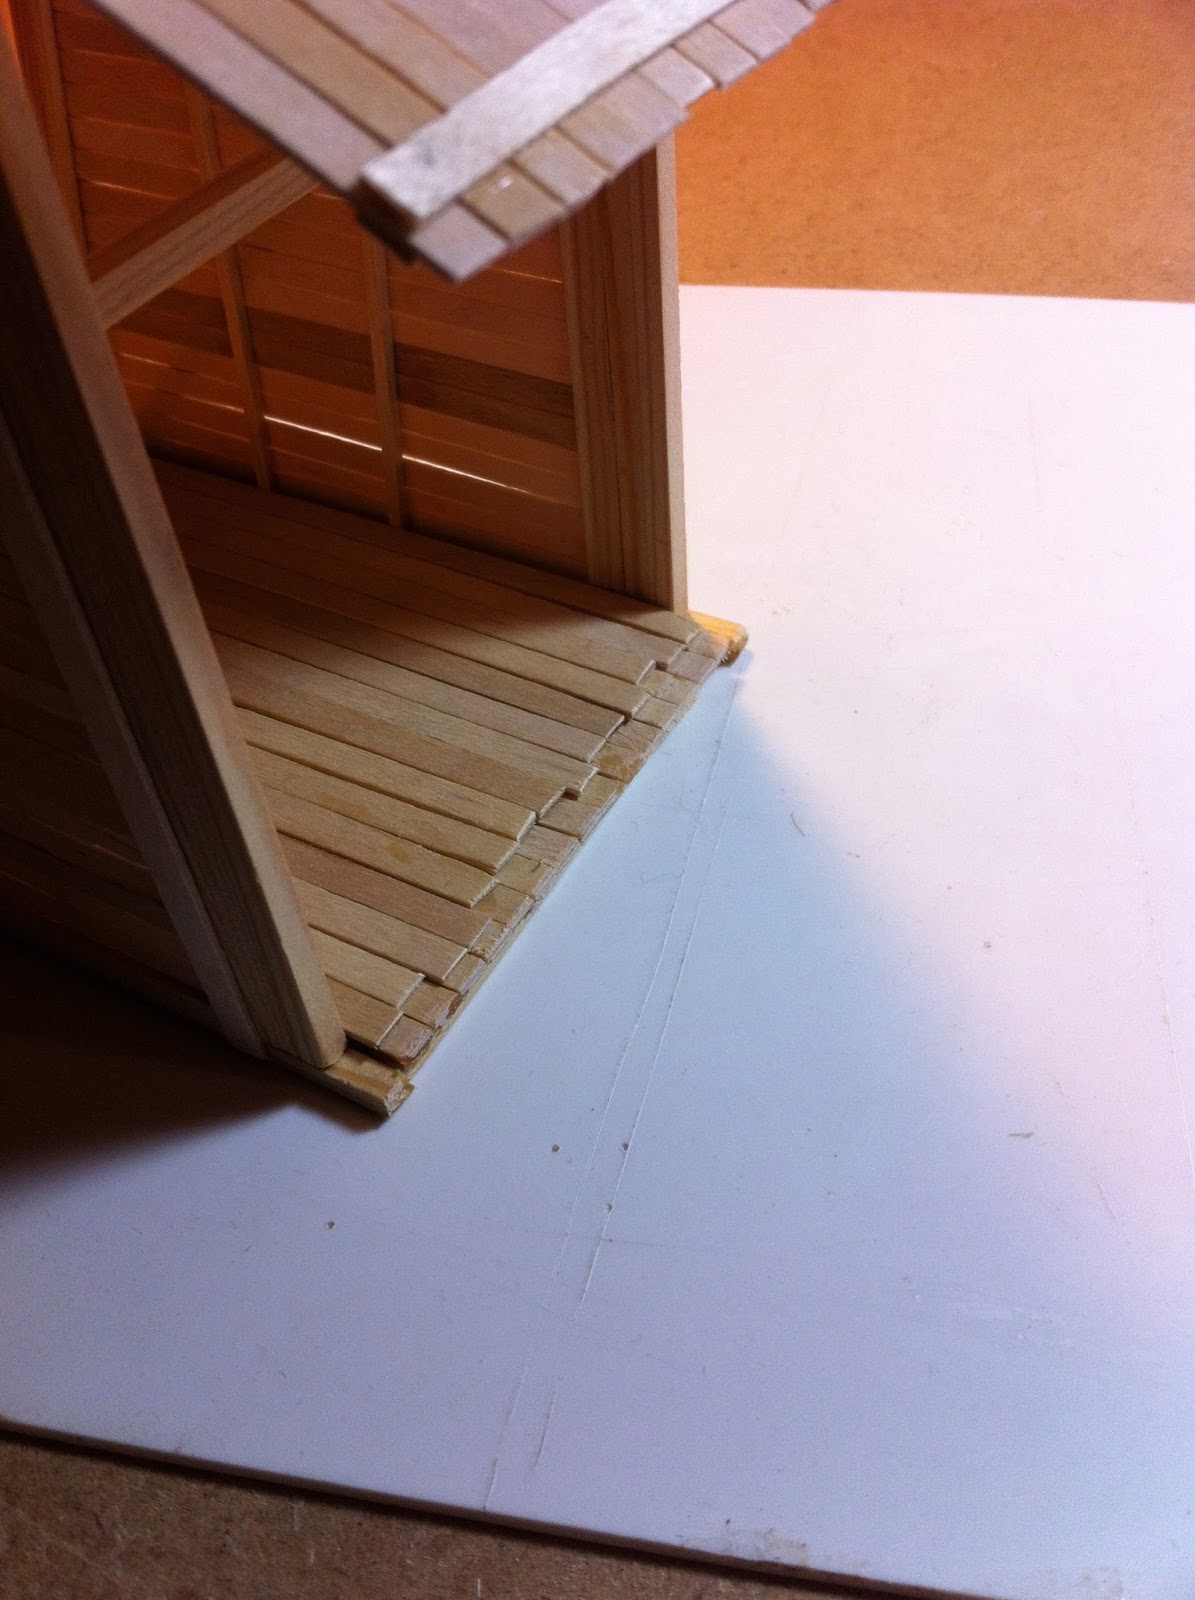
| Getting the planking on the sides of the tower. |
 |
| Just fixing the planking from the inside of the tower. |
 |
| The other side finished. |
 |
| Getting on the top floor of the tower - leaving some space for a ladder that will bring the men at arms on the top. |
 |
| The next floor - again leaving space for a ladder. |
 |
| The tower with palisades on its top. |
Now it was time to prepare the tower for getting the ramp for storming the walls. As I wanted the ramp to be movable I just had to add some more wooden sticks (2x 5mm on each side) on the front side of the tower (see next picture). Again a situation I didn´t have in mind then I started with the tower.
 |

 |
| Then I got some planking on the movable horizontal stick. Here a picture of the closed ramp. |
 |
| And how it looks like then it´s open. |
 |
| Just high enough to get an 28mm scaled figure out of the tower. |
 |
| As I told you above I had to shorten the ramp at the bottom or I won´t be able to get the tower next to a wall. |
My next thoughts turned about an ability to get some turning roles for the chain that should hold the ramp.
Again I decided to use some washers. But I had to find something to get between two washers that was a little bit smaller.
Taking a look at my glue I noticed that there was a plastic piece that could fit - and I had luck for it really did.


Then I got a round wooden stick. Again I had luck as the diameter of the stick just was the same as the hole within the washers.

 |
| The chain I wanted to use - I don´t know how long I call this chain my own and never had an idea for what to use it. |
 |
| If you don´t know there to get such a chain from - here is the address. |
 |
| First of all I glued a wire pin into the end of the chain. |
 |
| The ramp got a drilled hole to get the chain through the planking. |
 |
| Just a look inside the tower just to show there the turning roles had been fixed. |
 |
| A second round stick with two turning roles. |
 |
| This one was fixed here. |
 |
| Another round stick that is also movable as the ramp itself. |
 |
| And that´s how the chain was fixed in the end. |

 |
| Adding ladders to the separate floors. |
 |
| Using some figures to get the right distances for the loopholes. |
 |
| The front is finished. |
Finally I had to fix the wooden wheels on the bottom of the tower. As the ramp I wanted the wheels to be movable. So again I cut three sticks of now about 9cm length, drilled holes into its top ends and glued some wire pins into the holes.
Then I filed the edges of the top of the sticks so that the crossbeams of the wheels would not stop the wheels themselves while turning round.
The only thing left to do was to drill holes into the centre of the wheels and to get some wheel hubs preventing the wheels to get from the wire pins.
I had the idea of using the little round areas from plastic cast frames (see the second of the following pictures).
It worked well. I filed them and gave them a round look and glued them on the top of the wire pins.


 |
| The finished tower with its wheels. |
I can tell you that building this tower was a challenge for I didn´t have a construction plan or a sketch.
But I´m very proud of having passed this challenge and it was a lot of fun - though I often had to rethink some steps of building the tower.
Now the final step is to get the tower painted.
Cheers
Mike
Exellent tutorial indeed !!!
ReplyDeleteMany thanks. :)
DeleteHi Mike,
ReplyDeleteso this is really impressing!!
cheers
Uwe
Hi Uwe,
DeleteThank you.
Fantastic use of materials. If I ever get round to making a siege tower then I'm going to be copying this version.
ReplyDeleteYou're welcome. ;)
DeleteExcellent bit of modelling Mike! I'm sure your Cross & Crescent games are going to look great!
ReplyDeleteChristopher
Thank you, Christopher.
DeleteVery impressive!
ReplyDeleteThanks for watching, James.
DeleteThanks, Roger.
ReplyDeleteThis is great work. Thank you for posting the construction process!
ReplyDeleteHi Cincinnatus,
DeleteYou're welcome. ;)
Very inspiring build - thanks for sharing.
ReplyDeleteI´m very pleased to hear that you like it.
DeleteWhat a magnificent creation! It's convincing and functional to boot. Thanks for sharing how you put it together too...
ReplyDeleteGreat tutorial shared it on
ReplyDeletehttp://www.one-ring.co.uk/index.php
Bret
Thank you, Bret.
ReplyDeleteSpectacular project!
ReplyDeleteThanks, Jonathan.
DeleteYes, it took me a "few" hours to get it ready.
Simply brilliant! I'm amazed at your work here.
ReplyDeleteMany thanks, Monty.
DeleteIncredible "Do-it-yourself" tower...what a fantastic and detailed job!!
ReplyDeleteThanks, Phil. ;)
Delete