Building a rocky little piece of terrain - Tutorial No1
Ian asked me to post a little tutorial how I made my rocky terrain I´ve shown on my blog last time.
So here is the first part of this tutorial.
First of all I´ve cut some plastic strips (about 1 inch in square). I used some old blister packs from miniatures for that. So this is further kind of recycling. :)
These strips were glued on the middle of the damaged CD´s so that no sand, glue or something else could run out of the hole in the middle of the CD.
Some might think that this in not necessary, but I chose to do it.
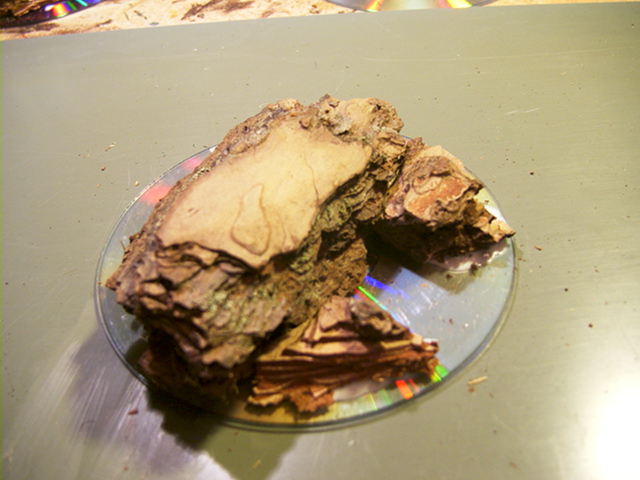
After that the bark is placed and glued on the CD´s.
Just break it into some little pieces to give the rocks the structure or hight you want them to have.
For the bark is not flat, there will often be a space between the piece of bark and the CD.
So it could happen that some glue may run out of the hole.
If you don´t pay attention, this could glue the CD on your working table or at least cause a mess.
So that´s the reason why I use the plastic strips mentioned above.
I always use white glue for this part.
Here are some other "constructions".
This time I´ve decided to produce some terrain pieces parallel to save some time.
The good thing is that you´re allowed to create your favorite style.
After this step it is time to put on the foam material to construct a smooth passing to the earthwork that will later be modeled or glued on the edges of the CD.
It could look like this.
Now it´s time to put on some sand (if you want to). I always use bird sand for this because it has very fine granules.
I´ve also put on some smaller stones to give the terrain more structure.
And just another one.
After the glued sand has dried I´ve put on a milky mixture of white glue and water.
This is just to make the bark harder.
If you don´t do that, the layers of the bark will surely break while using it on your gaming table.
So this is a very recommendable phase.
As I already told in my first post on this topic the drying phase takes the longest part of construction.
So it is time to be patient -
just to give the glue the necessary time to dry.
And just to give me some time to work on the second part of this tutorial. :)
To be continued...
Cheers
Mike


Thanks for the tutorial! Even without paint the pieces look very rocky ;) I'm looking forward for the rest.
ReplyDeleteYou´re welcome. :)
ReplyDeleteSo it´s always useful to take a bag or something like that while going for a walk in the woods. Mother nature hides a lot of things we can use for our hobby.
Thanks for the tutorial, if I copied this just from the original pics I would have missed one or two bits and the result would have been rather disapointing
ReplyDeleteIan
Hi Ian,
DeleteI just posted the second part of the tutorial today. Maybe I´m able to post the third part tomorrow. I think I will be able to do so.
Cheers
Mike