Manufacturer: DIY
Scale: 28mm
Hi again!
A friend of mine showed me the rules of Blood&Plunder a few weeks ago and as I like skirmish games it was no wonder that I started with these rules, too.
In times of Corona there is a lot of time at home and also for the hobby though I don´t take much use of this. Some days I am not inspired, some days I would like to finish all my projects. But that is the good thing concerning a hobby - you can do it at the time you like to and don´t have to....
As I am not really in the mood for painting figures at the moment (though I also do so) my favourite is to create terrain pieces.
And so this is the result of the last two days - a protected position for some pirates´cannons.
Just a few pictures of the ready piece of terrain and then some photos and description of the working process if you like to read further.
Hope you like it :)
Stay healthy.
Cheers
Mike
And here are some pictures of the working process.
 |
| First of all there is the idea how the piece of terrain should look like. Then there is the stadium of racking your brain how to do it. |
 |
| Sometimes a few difficulties appear that you have to solve. Here I needed to glue some cardboard to equal the different hights of two styrofoam pieces. |
 |
| The shape of the hill was roughly done and I was able to start with glueing the rock pieces. |
 |
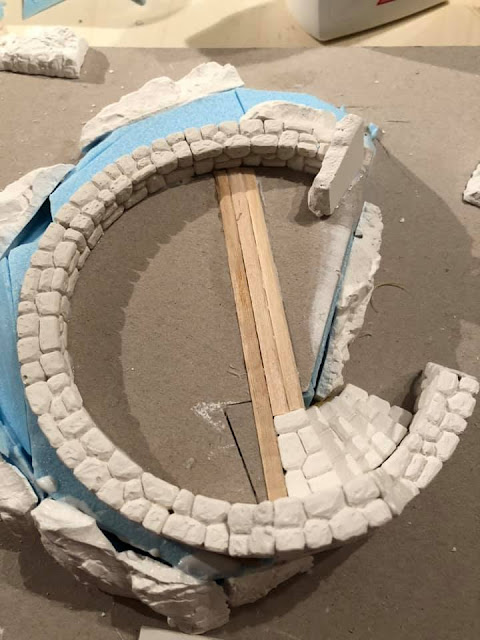
| Doing the wooden planks. |
 |
| The result of the construction phase. |
 |
| Next step was to fill the gaps with filler (Moltofill). |
 |
| After filling the gaps and smoothing the filler. |
 |
| I like the casted stones of HirstArts very much but I don´t like the gaps between them. |
 |
| It doesn´t look very realistic. |
 |
| I never tried this before though I have already done some terrain pieces with those stones. But this time I decided to fill the gaps with some filler. |
 |
| At first I placed some filler on the stones and started to blend it into the gaps using a brush and some drops of water. |
 |
| Not perfect but much better than before in my opinion. |
 |
| After the filler was dry I started with painting the wooden planks and also the earth parts of the model. |
 |
| After that it was totally covered with a thinner black wash. |
 |
| After the washes had dried it was time for the first dry brushing of a darker gray. |
 |
| There is not much to see from the brown washes but they still break through the gray. But my first thought was that I had ruined the model. |
 |
| This opinion got better after the next two steps of dry brushing with lighter gray tones. |
 |
| The model after the last dry brushing. |


