Manufacturer: Selfmade
Scale: 1:30 (suitable for 60mm toysoldiers)
Hi,
as I have posted about a finished test section of a wooden fortification about two or three weeks ago I decided to get into this project completely. This will take some time. But after having posted some pictures of this project within the Facebook-Group concerning JohnJenkins figures I got a lot of positive reactions. https://www.facebook.com/groups/333462707235698
So - let´s do it.
As this is WIP there will be several posts about this project. I want to do this in a kind of a tutorial how I made the single sections.
Within this post I will show you a bit of the techniques an tools I am gonna use.
Hope you enjoy it.
Cheers
Mike
.JPEG) |
| Further I got me some other "test" sections to see if the project would work. |
.JPEG) |
| You can see the already painted test section that I had posted a few weeks ago. The unfinished log cabin had been constructed some months ago and within this project I want to finish it aswell. |
.JPEG) |
| Next step was to cut another plate of styrofoam into stripes 1x1cm each by using my Proxxon foam cutter. |
 |
| Now it is time to get the rectangular stripe into a rounded shape. |
.JPEG) |
| So I found me a better way. Rolling the stripes is also stressful but not as hard as pressing the stripes with your fingers. |
 |
| That´s a good result to continue. |
 |
| A already prepared section. 9,5cm in height, 6cm deep and 20cm in length. |
.JPEG) |
| Now cut the rounded stripe to 20cm length... |
.JPEG) |
| ...and glue it on to the bottom of the wall section,... |
.JPEG) |
| ...use some pins to fix it,... |
.JPEG) |
| ...and sink the pins completely into the foam. Later they will look like nails fixing wooden logs. |
.JPEG) |
| The section fully planked with logs. |
.JPEG) |
| Here comes the next step: grap a modelling scalpel that´s not too sharp... |
.JPEG) |
| ...and begin lightly to carve some structure into the foam... |
.JPEG) |
| ...so that it looks like this. A nice irregular structure looking like the bark of a tree. |
.JPEG) |
| Now take another rounded stripe of foam and get the top into shape by using a cutter knife. |
.JPEG) |
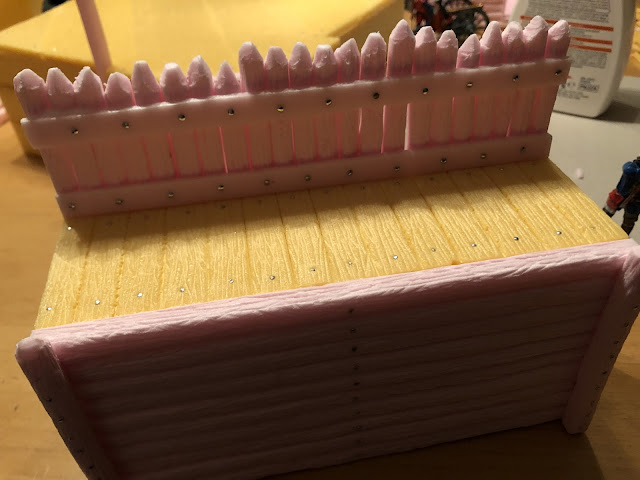
| Place at least two logs at the ends of the section like this and again fix them with some "nails". |
.JPEG) |
| These logs also have to be structured. |
.JPEG) |
| Now the other side of the section is planked with vertical logs, that also have been structured and fixed with "nails" by using pins. |
 |
| Now I used real nails. I had to search for very short nails because for the next step the normal pins would have been too long. |
 |
| So this section is done. And this took me about three hours to do. |
 |
| Then I carved the structure of the walkway into the top of the section. |
 |
| The result after about one hour. |
 |
| Again a lot of pins had been used to give the impression of nails. |
 |
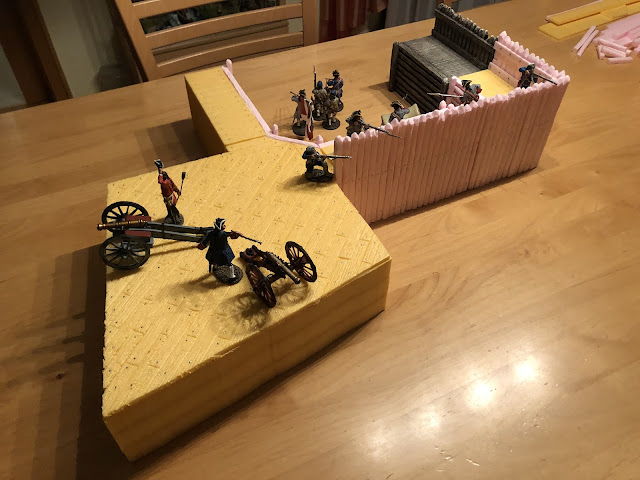
| I also started to plank the second straight section just to look if every log is in its right place after putting the modular sections together. |
 |
| In my opinion this is a pretty good result. |
 |
| This also seems to fit pretty well. |
 |
| My efforts for this first WIP. |
 |
| What are your thoughts about this? |
.JPEG)


Super project Mike, really enjoyed your tutorial, should look great on the table when finished, looking forward to the next part.
ReplyDeleteThank you very much, Donnie. I hope that the motivation of the moment lasts for a long time so there is a chance to finish this project within months and not within years as usual. :)
DeleteMy first thought was that it looks a lot of work. Nevertheless the result is very pleasing.
ReplyDeleteStephen
Hi Stephen. Thank you very much. :)
DeleteThat's brilliant!
ReplyDeleteMany thanks, Ray :)
DeleteWhat marvellous modelling and a superb step-by-step tutorial.
ReplyDelete(I am really pleased to have been alerted to your blog by a post on Ray Rousell's)
Regards, James
Thank you very much, James.:)
Delete